
使用 React, Vue, Express 等框架在 Deno 中构建应用程序。

使用 JavaScript 构建网站和应用程序的框架数不胜数。(事实上,当你读到这篇文章时,一个新的框架刚刚发布。)由于 npm 已成为许多 JavaScript 事物的主要分发平台,因此大多数框架都需要使用 npm。
有了Deno 1.28,你现在可以使用这些 JavaScript 框架进行构建,例如Express、React、Vue等。
这篇博文将向你展示如何在 Deno 中开始使用这些 JavaScript 框架
查看我们的手册,了解更多关于如何将 JavaScript 框架与 npm 一起使用的指南.
编写更少的代码
使用 Deno 构建这些框架将更快,所需配置更少,并使用更少的样板代码
- 花费更少的时间评估和构建自己的工具——Deno 附带了一套强大的工具链,包括
deno test、deno lint、deno fmt等。 - 默认情况下没有
package.json、.tsconfig或node_modules子目录,这可以让你专注于重要的代码 - 没有单独的
npm install步骤——模块在特殊的全局目录中缓存一次
在下面的示例中,我们将展示使用 npm 和 Deno 入门是多么容易。
Express
Express是一个流行的 Web 框架,以其简洁、不固执己见和庞大的中间件生态系统而闻名。
让我们使用 Express 和 Deno 创建一个简单的 API。
创建 main.ts
我们来创建 main.ts
touch main.ts在 main.ts 中,我们来创建一个简单的服务器
// @deno-types="npm:@types/express"
import express from "npm:express@4.18.2";
const app = express();
app.get("/", (req, res) => {
res.send("Welcome to the Dinosaur API!");
});
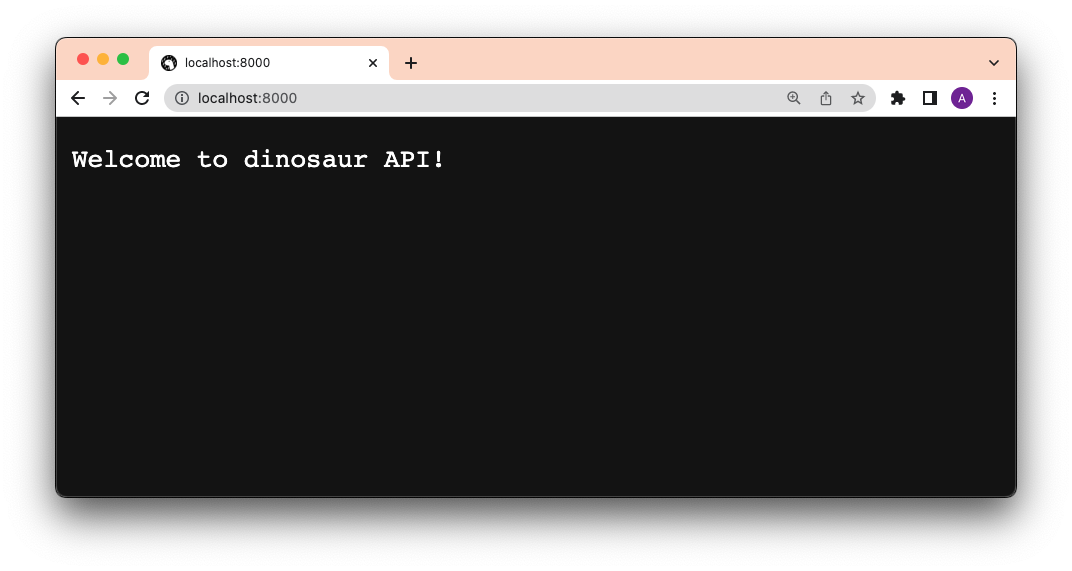
app.listen(8000);我们来运行这个服务器
deno run --allow-net main.ts并将浏览器指向 localhost:8000。你将看到
Welcome to the Dinosaur API!添加数据和路由
下一步是添加一些数据。我们将使用从这篇文章中找到的恐龙数据。你可以从这里复制。
我们来创建 data.json
touch data.json并粘贴恐龙数据。
接下来,我们来将数据导入 main.ts。让我们在文件顶部添加这一行
import data from "./data.json" with { type: "json" };然后,我们可以创建路由来访问这些数据。为了简单起见,我们只为 /api/ 和 /api/:dinosaur 定义 GET 处理程序。在 const app = express(); 行后面添加以下内容
app.get("/", (req, res) => {
res.send("Welcome to the Dinosaur API!");
});
app.get("/api", (req, res) => {
res.send(data);
});
app.get("/api/:dinosaur", (req, res) => {
if (req?.params?.dinosaur) {
const filtered = data.filter((item) => {
return item["name"].toLowerCase() === req.params.dinosaur.toLowerCase();
});
if (filtered.length === 0) {
return res.send("No dinosaurs found.");
} else {
return res.send(filtered[0]);
}
}
});
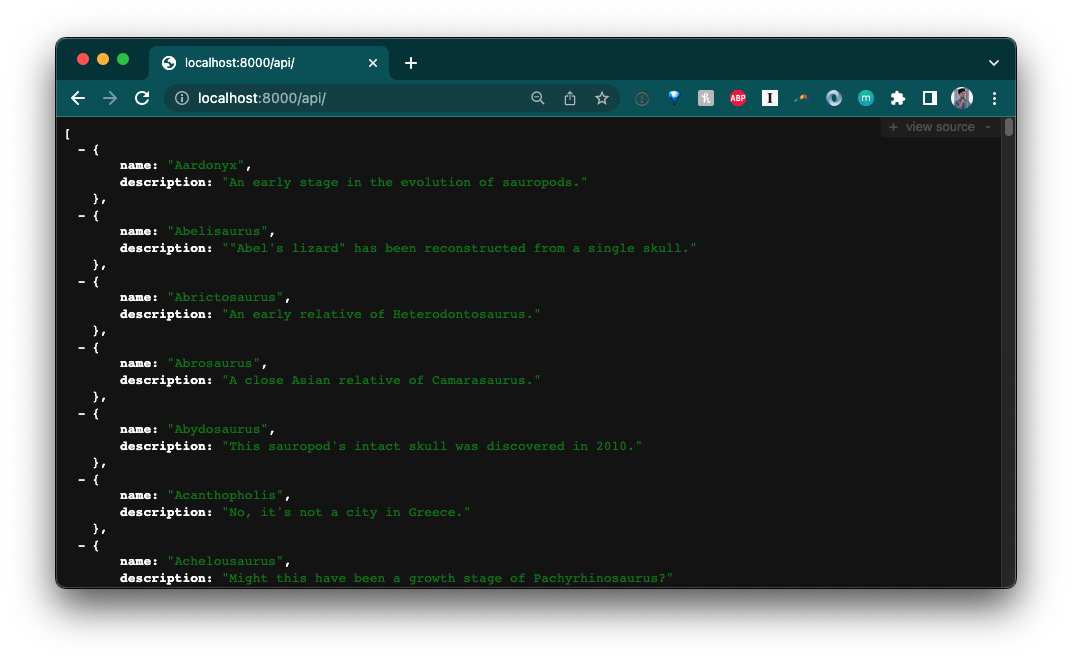
app.listen(8000);我们使用 deno run --allow-net main.ts 运行服务器并查看 localhost:8000/api。你将看到一个恐龙列表
[
  {
    "name": "Aardonyx",
    "description": "An early stage in the evolution of sauropods."
  },
  {
    "name": "Abelisaurus",
    "description": "\"Abel's lizard\" has been reconstructed from a single skull."
  },
  {
    "name": "Abrictosaurus",
    "description": "An early relative of Heterodontosaurus."
  },
...
当我们访问 localhost:8000/api/aardonyx 时
{
  "name": "Aardonyx",
  "description": "An early stage in the evolution of sauropods."
}
太棒了!
React
虽然 Express 非常适合 API 和服务,但React 则专为用户界面而设计。它推广了一种声明式设计界面的方法,并采用响应式数据模型。由于其流行度,它成为使用 Deno 构建 Web 应用程序时最受欢迎的框架,这并不令人惊讶。
我们来创建一个应用程序,显示一个恐龙列表。当你点击其中一个时,它会带你到一个恐龙页面,显示更多细节。
创建 Vite Extra
我们来使用Vite快速搭建 Deno 和 React 应用程序
deno run --allow-read --allow-write --allow-env npm:create-vite-extra@latest我们将项目命名为“dinosaur-react-app”。然后,cd 进入新创建的项目文件夹。
添加后端
下一步是添加后端 API。我们将创建一个非常简单的 API,返回恐龙信息。
在该目录中,我们创建一个 api 文件夹。在该文件夹中,我们将创建 main.ts 文件(运行服务器)和 data.json(硬编码数据)。
mkdir api && touch api/data.json && touch api/main.ts将此 JSON 文件复制并粘贴到你的 api/data.json 中。
然后,我们来更新 api/main.ts
import { Application, Router } from "https://deno.land/x/oak@v11.1.0/mod.ts";
import { oakCors } from "https://deno.land/x/cors@v1.2.2/mod.ts";
import data from "./data.json" with { type: "json" };

const router = new Router();
router
  .get("/", (context) => {
    context.response.body = "Welcome to dinosaur API!";
  })
  .get("/api", (context) => {
    context.response.body = data;
  })
  .get("/api/:dinosaur", (context) => {
    if (context?.params?.dinosaur) {
      const filtered = data.filter((item) =>
        item["name"].toLowerCase() === context.params.dinosaur.toLowerCase()
      );
      if (filtered.length === 0) {
        context.response.body = "No dinosaurs found.";
      } else {
        context.response.body = filtered[0];
      }
    }
  });

const app = new Application();
app.use(oakCors()); // Enable CORS for All Routes
app.use(router.routes());
app.use(router.allowedMethods());

await app.listen({ port: 8000 });
这是一个非常简单的 API 服务器,使用oak,它将根据路由返回恐龙信息。我们来启动 API 服务器
deno run --allow-env --allow-net api/main.ts如果我们访问 localhost:8000,我们会看到
到目前为止看起来不错。
添加路由器
我们的应用程序将有两个路由:/ 和 /:dinosaur。
我们将使用react-router-dom来实现我们的路由逻辑。我们来将它添加到 vite.config.mjs 的依赖项中
import { defineConfig } from "npm:vite@^3.1.3";
import react from "npm:@vitejs/plugin-react@^2.1";

import "npm:react@^18.2";
import "npm:react-dom/client@^18.2";
import "npm:react-router-dom@^6.4"; // Add this line

// https://vite.org.cn/config/
export default defineConfig({
  plugins: [react()],
});
一旦我们将依赖项添加到那里,我们就可以在整个 React 应用程序中不使用 npm: 限定符来导入它们。
接下来,我们打开 src/App.jsx 并添加我们的路由逻辑
import React from "react";
import {
  BrowserRouter as Router,
  Navigate,
  Route,
  Routes,
} from "react-router-dom";
import Index from "./pages/Index.jsx";
import Dinosaur from "./pages/Dinosaur.jsx";

export default function App(props) {
  return (
    <Router>
      <Routes>
        <Route exact path="/" element={<Index />} />
        <Route exact path="/:dinosaur" element={<Dinosaur />} />
        <Route path="*" element={<Navigate to="/" />} />
      </Routes>
    </Router>
  );
}
接下来,我们添加 <Index> 和 <Dinosaur> 页面。
添加页面
此应用程序将有两个页面
src/pages/Index.jsx:我们的索引页面,列出了所有恐龙src/pages/Dinosaur.jsx:我们的恐龙页面,显示恐龙的详细信息
我们将创建一个 src/pages 文件夹并创建 .jsx 文件
mkdir src/pages && touch src/pages/Index.jsx src/pages/Dinosaur.jsx我们从 <Index> 开始。此页面将从 localhost:8000/api fetch 数据并通过 JSX 渲染。
import React, { useEffect, useState } from "react";
import { Link, useParams } from "react-router-dom";

const Index = () => {
  const [dinos, setDinos] = useState([]);
  useEffect(() => {
    fetch(`https://:8000/api/`)
      .then(async (res) => await res.json())
      .then((json) => setDinos(json));
  }, []);

  return (
    <div>
      <h1>Welcome to the Dinosaur app</h1>
      <p>
        Click on a dinosaur below to learn more.
      </p>
      <div>
        {dinos.map((dino) => {
          return (
            <div>
              <Link to={`/${dino.name.toLowerCase()}`}>{dino.name}</Link>
            </div>
          );
        })}
      </div>
    </div>
  );
};

export default Index;
接下来,在 <Dinosaur> 中,我们将做同样的事情,但改为 localhost:8000/api/${dinosaur}
import React, { useEffect, useState } from "react";
import { Link, useParams } from "react-router-dom";

const Dinosaur = () => {
  const { dinosaur } = useParams();
  const [dino, setDino] = useState({});
  useEffect(() => {
    fetch(`https://:8000/api/${dinosaur}`)
      .then(async (res) => await res.json())
      .then((json) => setDino(json));
  }, []);

  return (
    <div>
      <h1>{dino.name}</h1>
      <p>
        {dino.description}
      </p>
      <Link to="/">See all</Link>
    </div>
  );
};

export default Dinosaur;
我们来启动 React 应用程序
deno task start并点击应用程序
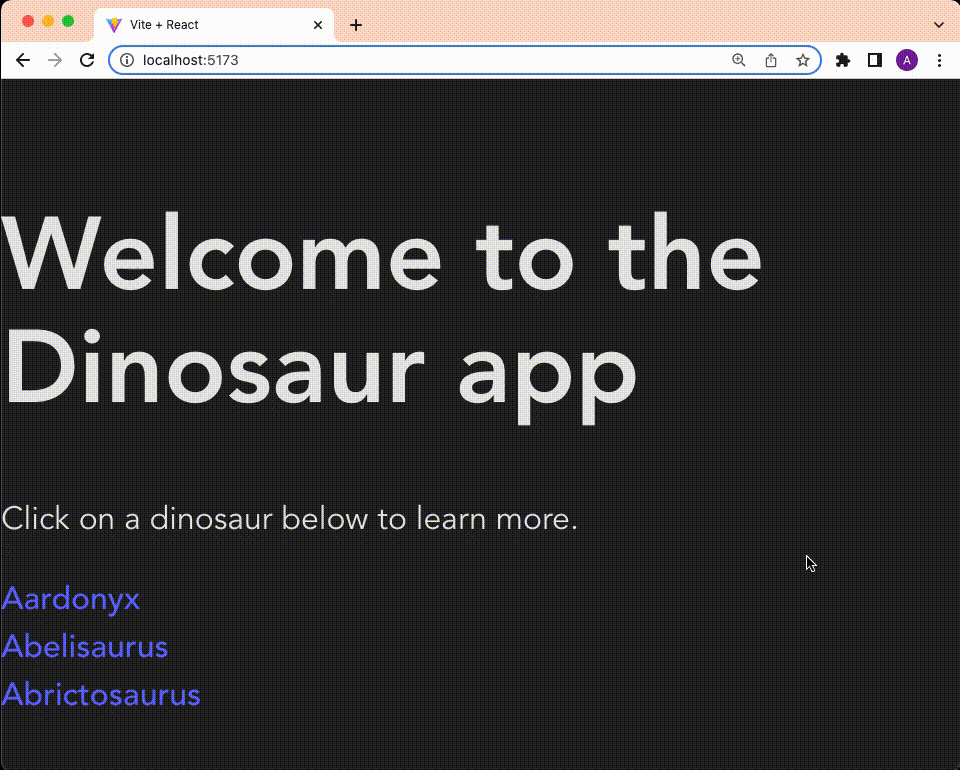
成功!
有关使用 React 的更多信息,请参阅其文档。
Vue
Vue是一个渐进式的前端 JavaScript 框架,专为性能和多功能性而构建。
我们来创建与 React 中完全相同的应用程序,但现在使用 Vue。
运行 npm:create-vite-extra
我们将使用 Vite 搭建我们的 Vue 应用程序
deno run --allow-read --allow-write --allow-env npm:create-vite-extra@latest为你的项目命名,然后选择“deno-vue”。
然后,cd 进入你的新项目并运行
deno task dev你现在应该能够在浏览器中查看你的默认 Deno 和 Vue 应用程序

添加后端
下一步是添加后端 API。我们将创建一个非常简单的 API,返回恐龙信息。
在该目录中,我们创建一个 api 文件夹。在该文件夹中,我们将创建 main.ts 文件(运行服务器)和 data.json(硬编码数据)。
mkdir api && touch api/data.json && touch api/main.ts将此 JSON 文件复制并粘贴到你的 api/data.json 中。
然后,我们来更新 api/main.ts
import { Application, Router } from "https://deno.land/x/oak@v11.1.0/mod.ts";
import { oakCors } from "https://deno.land/x/cors@v1.2.2/mod.ts";
import data from "./data.json" with { type: "json" };

const router = new Router();
router
  .get("/", (context) => {
    context.response.body = "Welcome to dinosaur API!";
  })
  .get("/api", (context) => {
    context.response.body = data;
  })
  .get("/api/:dinosaur", (context) => {
    if (context?.params?.dinosaur) {
      const found = data.find((item) =>
        item.name.toLowerCase() === context.params.dinosaur.toLowerCase()
      );
      if (found) {
        context.response.body = found;
      } else {
        context.response.body = "No dinosaurs found.";
      }
    }
  });

const app = new Application();
app.use(oakCors()); // Enable CORS for All Routes
app.use(router.routes());
app.use(router.allowedMethods());

await app.listen({ port: 8000 });
这是一个非常简单的 API 服务器,使用oak,它将根据路由返回恐龙信息。我们来启动 API 服务器
deno run --allow-env --allow-net api/main.ts如果我们访问 localhost:8000/api,我们会看到
到目前为止,一切顺利。
添加 Vue 组件
我们来更新 src/components。我们将添加以下文件
HomePage.vue,主页的组件Dinosaurs.vue,列出所有恐龙名称作为锚点链接的组件,以及Dinosaur.vue,显示单个恐龙名称和描述的组件
touch src/components/HomePage.vue src/components/Dinosaurs.vue src/components/Dinosaur.vue在创建组件之前,我们先添加一些状态管理。
使用 store 维护状态
为了在 <Dinosaur> 和 <Dinosaurs> 组件之间维护状态,我们将使用Vue store。请注意,对于更复杂的状态管理,请查看 Vue 推荐的Pinia 库。
创建 src/store.js 文件
touch src/store.js并在其中添加
import { reactive } from "vue";

export const store = reactive({
  dinosaur: {},
  setDinosaur(name, description) {
    this.dinosaur.name = name;
    this.dinosaur.description = description;
  },
});
我们将 store 导入到 Dinosaurs.vue 和 Dinosaur.vue 中,以设置和检索恐龙名称和描述。
更新 Vue 组件
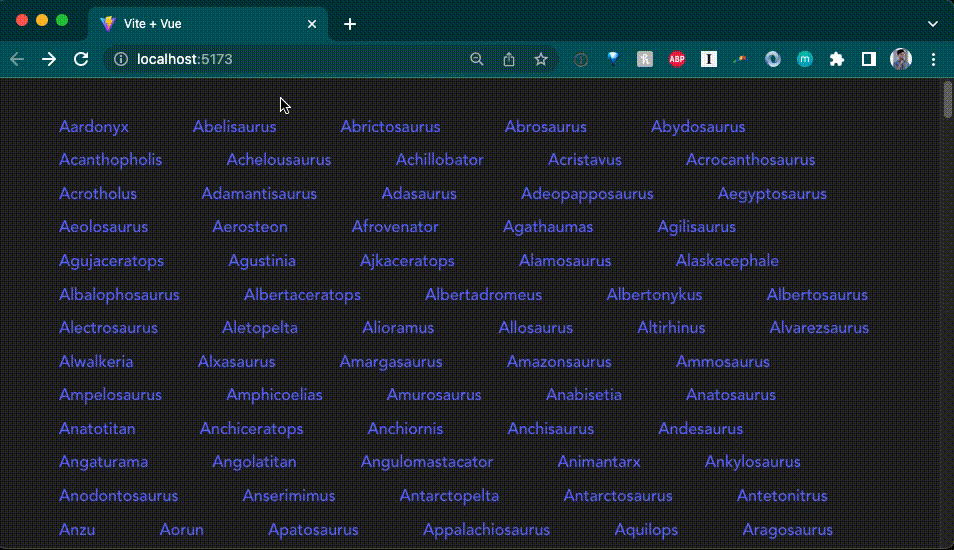
在 Dinosaurs.vue 中,我们将做三件事
- 向我们的 API 发送
GET请求并将其作为dinosaurs返回 - 遍历
dinosaurs并在指向<Dinosaur>组件的<router-link>中渲染每个dinosaur - 在每个
dinosaur的@click上添加store.setDinosaur(),这将设置store
以下是完整的代码
<script>
import { ref } from 'vue'
import { store } from '../store.js'
export default ({
  async setup() {
    const res = await fetch("https://:8000/api")
    const dinosaurs = await res.json();
    return {
      dinosaurs
    }
  },
  data() {
    return {
      store
    }
  }
})
</script>

<template>
  <div class="container">
    <div v-for="dinosaur in dinosaurs" class="dinosaur-wrapper">
      <span class="dinosaur">
        <router-link :to="{ name: 'Dinosaur', params: { dinosaur: `${dinosaur.name.toLowerCase()}` }}">
          <span @click="store.setDinosaur(dinosaur.name, dinosaur.description)">
            {{dinosaur.name}}
          </span>
        </router-link>
      </span>
    </div>
  </div>
</template>

<style scoped>
.dinosaur {
}
.dinosaur-wrapper {
  display: inline-block;
  margin: 0.15rem 1rem;
  padding: 0.15rem 1rem;
}
.container {
  text-align: left;
}
</style>
在 Dinosaur.vue 中,我们将添加
- 导入
store - 在 HTML 中渲染
store.dinosaur
<script>
import { store } from '../store.js';
export default {
  data() {
    return {
      store
    }
  }
}
</script>

<template>
  Name: {{ store.dinosaur.name }}
  <br />
  Description: {{ store.dinosaur.description }}
</template>
接下来,我们将更新 HomePage.vue。由于 Dinosaurs 组件需要从 API 获取数据,我们将使用<Suspense>,它管理组件树中的异步依赖项。
<script>
import { ref } from 'vue'
import Dinosaurs from './Dinosaurs.vue'
export default {
  components: {
    Dinosaurs
  }
}
</script>

<template>
  <Suspense>
    <template #default>
      <Dinosaurs />
    </template>
    <template #fallback>
      <div>Loading...</div>
    </template>
  </Suspense>

  <p>
    Check out
    <a href="https://vuejs.ac.cn/guide/quick-start.html#local" target="_blank"
      >create-vue</a
    >, the official Vue + Vite starter
  </p>
  <p class="read-the-docs">Learn more about using Deno and Vite.</p>
</template>

<style scoped>
.read-the-docs {
  color: #888;
}
</style>
总而言之,我们来更新 src/App.vue
<template>
  <router-view />
</template>;
添加路由
你会注意到我们使用了 <router-link> 和 <router-view>。这些组件是vue-router 库的一部分,我们必须在另一个文件中进行设置和配置。
首先,我们来在 vite.config.mjs 文件中导入 vue-router
import { defineConfig } from "npm:vite@^3.1.3";
import vue from "npm:@vitejs/plugin-vue@^3.2.39";

import "npm:vue@^3.2.39";
import "npm:vue-router@4";

// https://vite.org.cn/config/
export default defineConfig({
  plugins: [vue()],
});
接下来,我们来创建一个名为 router 的文件夹。在其中,我们来创建 index.ts
mkdir router && touch router/index.ts在 router/index.ts 中,我们将创建并导出 router,其中包含每个路由及其组件的信息。有关使用 vue-router 的更多信息,请查看其指南。
import { createRouter, createWebHistory } from "vue-router";
import HomePage from "../components/HomePage.vue";
import Dinosaur from "../components/Dinosaur.vue";

const routes = [
  {
    path: "/",
    name: "Home",
    component: HomePage,
  },
  {
    path: "/:dinosaur",
    name: "Dinosaur",
    component: Dinosaur,
    props: true,
  },
];

const router = createRouter({
  history: createWebHistory("/"),
  routes,
});

export default router;
接下来,在我们的 src/main.ts 文件中,其中包含前端应用程序的所有逻辑,我们必须导入并使用 router
import { createApp } from "vue";
import "./style.css";
import App from "./App.vue";
import router from "./router/index.ts";

const app = createApp(App);
app.use(router);
app.mount("#app");
我们来运行它,看看目前为止我们得到了什么
太棒了!
接下来是什么?
希望这些示例展示了使用 Deno 和 JavaScript Web 框架进行开发是多么容易。它们也是构建应用程序的起点。从这里,你可以添加适当的数据持久性、添加额外路由、实现身份验证等。最后,我们计划继续在我们的手册中添加操作指南。
我们也很高兴地宣布,我们将在明天,也就是太平洋时间 11 月 17 日星期四上午 9 点,在我们的 YouTube 频道上进行直播,届时我们将
- 讨论如何在 Deno 中使用 npm,
- 回答来自实时聊天或我们 Discord 的任何问题,并且
- 进行一些现场编程!
我们希望你能加入我们!
遇到困难?在我们的Discord上寻求帮助。